Bubble Tip Anemone Care Ultimate Guide for Success with Bubble Tip Anemones

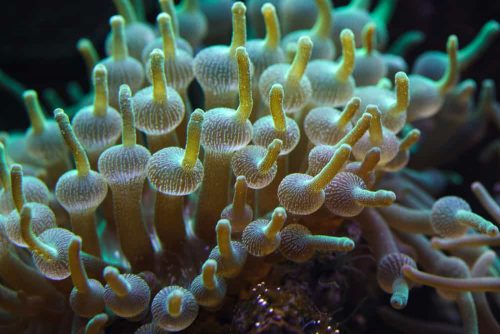
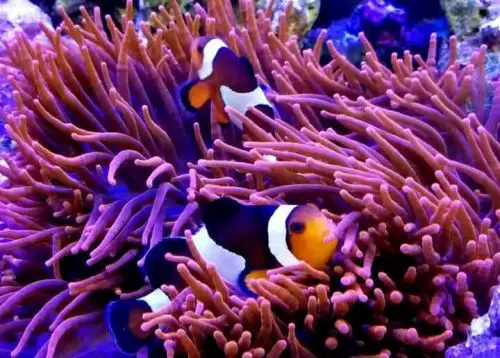
Bubble-tip anemones, also known scientifically as Entacmaea quadricolor, are a species of sea anemone often paired in aquariums with clownfish.

They are incredibly beautiful and come in a variety of colors such as brown, green, orange, red, and rose pink. While clownfish are a relatively easy fish for aquarists to care for, the invertebrate anemones are more challenging to keep.

If they are to thrive, they need very particular lighting, stability, and water flow requirements, coupled with specific supplemental feeding protocols.

In this guide, we focus on the easiest species of anemones to keep as well as those most prone to clownfish hosting—bubble-tip anemones.

We delve deeper into bubble-tip anemone care and give saltwater aquarists the proper instructions to care for bubble-tip anemones. Keep reading as we explore their proper feeding routines, lighting parameters, water flow, and gravity requirements, among other things.

The Challenge of Caring for Anemones

It may surprise you to know that although these invertebrates look like corals, bubble-tip anemones are more closely related to jellyfish than corals. Just like jellyfish, they are single-celled animals—and therefore more sensitive to chemical and light changes.

These inverts need lots of light, in the PAR of 200-350µmol, similar in levels to SPS corals. They need good LED lighting to thrive because they contain zooxanthellae algae in their tissues, which enable them to photosynthesize. 

As a rule, 4-6 watts per gallon of 14,000K or higher should be a perfect lighting starting point for 20-inch tanks, good enough to keep these inverts healthy.

Bubble-tip anemones require a lot of stability to thrive, so ideally, do not place them into a tank you’ve just purchased. We recommend that you wait at least six months before you add one of these inverts since that is enough time to get a healthy amount of coralline algae growth, which indicates that your reef tank has achieved stability.

Anemones are territory-sensitive and will sting any corals in their space. As an essential part of bubble-tip anemone care, if you notice that your invert has moved near corals, move the corals out of the way within 24-48 hours.

That said, these animals do move around a lot in general. You’ll need to oversee their movements in the tank as they tend to get stuck on the wavemaker, which can be fatal.

Why Bubble Tip Anemones Are Great First-Time Anemones

Bubble Tip Anemone Care
Green bubble-tip anemone (Entacmaea quadricolor).

Bubble-tip anemones are excellent first-time anemones because they are easier to propagate and maintain. Besides looking great and adding exotic color to your reef tank, these creatures are an easier anemone to reproduce. They are incredibly affordable, too.

However, failure to meet these creatures’ needs could easily lead to their deaths. If you, as a first-time saltwater aquarist, miscalculate the pristine conditions, water changes, and feeding routines needed for your anemones to thrive, and lose your anemones, you can easily replace them with other inverts.

Bubble Tip Anemone Care – Feeding, Flow, Lighting, & Selection

Newbie and seasoned aquarists dream of owning these incredible-looking invertebrates since they are colorful, mesmerizing, and a joy to behold. 

However, you’ll need to ensure that you create a stable environment in which they can grow, providing the proper feeding, flow, lighting, and selection to maximize their health.  

Feeding: What Do Anemones Eat?

Bubble-tip anemones are photosynthetic, which means that they need light to create food from which they get their nutrients. They are also predatory and will prey naturally on other animals.

However, these creatures also eat food from any fish they host and still require occasional supplemental feeding to maintain their overall health and color. Protein snacks may include small morsels of freeze-dried:

  • Brine shrimp
  • Crab
  • LRS reef frenzy
  • Krill
  • Mysis shrimp
  • Silversides

Feed your bubble-tip anemones a couple of times a week if they are in the reef tank alone.

During feeding, always ensure that you thaw the food before giving it to them. Attach the morsel to clean tweezers or a stick and then gently touch the anemone with it. The anemone will use its tentacles to feed.

If you’ve paired your anemone with any fish in your reef tank, you can reduce the feeding routine since the fish in the tank will provide adequate nourishment.

Optimizing Flow for Your Bubble Tip Anemone

Aquarists agree that too much flow can cause the anemone to stretch out and look stringy—these creatures enjoy a moderate current.

Never direct jets at the anemone since the direct flow will force them to move and damage your reef tank. Also, ensure that you get adequate covers for your wavemakers to prevent the anemone from jamming them if they move within the reef tank.

Bubble-tip anemones prefer warmer, alkaline waters. Maintain temperatures of 72°F-82°F, pH levels of 8.1-8.4, a water hardness of 8-12 dKH, and a specific gravity of 1.023 to 1.025 to ensure that your creatures thrive.

Anemones also prefer water that’s free of organic waste, so you’ll need to invest in a protein skimmer and regularly change the water to maintain the proper levels of trace elements such as iron supplements that specifically benefit the zooxanthellae algae.

Lighting for Your Bubble Tip Anemone

Lighting is an essential aspect of bubble-tip anemone care.

These creatures need lots of light to thrive because they’re partly photosynthetic and need light to synthesize their food. They also have a symbiotic relationship with zooxanthellae, which live inside their bodies and on which they feed.

Without proper LED lighting, bubble-tip anemones will “bleach,” a fatal process in which they expel the zooxanthellae from their bodies and turn white.

To achieve the proper lighting levels of 220 – 350PAR, you may use fluorescent bulbs, LED lights, or even metal halide lights. Be sure that you keep the lights on for 12 hours each day for the proper development of your invert.                              

Selecting Your Bubble Tip Anemone

A crucial part of bubble-tip anemone care is the proper selection. Always choose an aqua-cultured anemone over a wild one as these tend to thrive better in reef tanks, are more affordable, and have a less potent sting.

When choosing your specimen, always opt for those that have:

  • Puckered or closed mouths
  • A firm grip of the glass or substrate
  • A healthy, intact base
  • A smaller size, ideally 3-4 inches in diameter
  • Healthy, inflated tentacles

Remember, if your bubble-tip anemone is not attached to substrate or glass in the dealer’s reef tank, it may very well have difficulty attaching to your reef tank. You should also observe as your dealer handles your anemone—if it doesn’t react or contract, it isn’t robust and most likely won’t survive long.

And finally, your anemone should be slightly sticky to the touch. This quality means that it can still fire its nematocysts or stinging cells and be easier to feed.             

The Types of Anemones

Bubble-tip anemones are unique creatures that possess short tentacles with a bulbous tip. These tentacles can elongate or contract, depending on the changes in their environment. Interestingly, anemones that grow in deeper sea waters with less light tend to have longer tentacles.

Below the tentacles is the anemone’s base or foot, composed of muscles that help the creature move or anchor onto rocks. This area is incredibly delicate—and, when ruptured, can be fatal.

Several bubble-tip anemone types are available in the market, and they come in a variety of shapes, sizes, and colors:

Carpet Anemones

Marine carpet anemone surrounded by floating fish in an aquarium

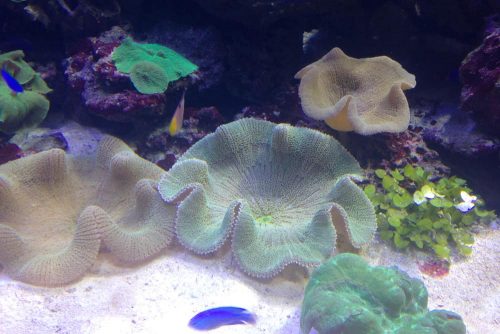
Carpet anemones are giant, striking, hardy, and quite deadly.

They only feed on fish. These creatures have a high mortality rate, with over 90% dying within the first year. We would not recommend carpet anemones for beginner aquarists because of these factors.      

Long-Tentacle Anemones

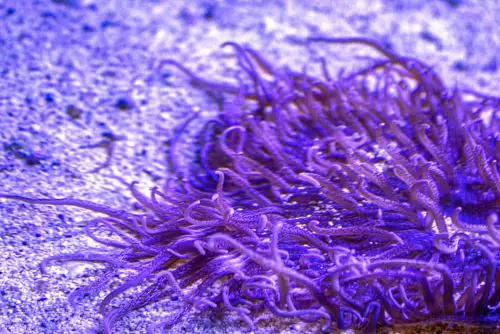
Long-tentacle anemones or corkscrew anemones are much like carpet anemones as they require perfect water conditions to thrive. These are quite large and don’t need as much light but are extremely sensitive to changes. Again, we would not recommend this variety for beginners since they are quite challenging.

Rock Flower Anemones

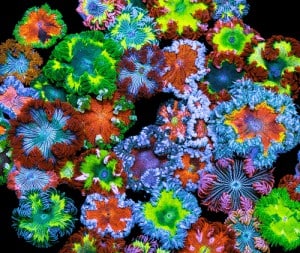
These colorful anemones are naturally found in the Caribbean and are simple to keep. However, their only disadvantage is that clownfish won’t host them.

They are excellent for adding exotic color to your reef tank and make terrific first-time picks.

However, they will aggressively sting corals near them and tend to move a lot in the tank until they find a comfortable spot.

Sebae Anemones

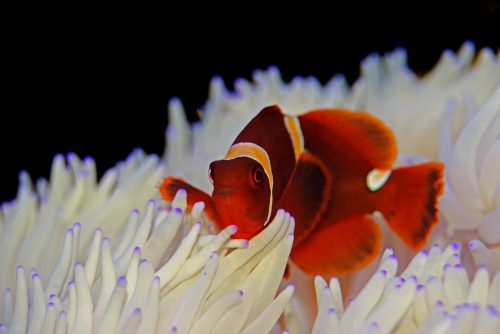
Sebae anemones are a colorful anemone typically hosted by the maroon clownfish. They prefer to anchor on sand instead of rock and require near-perfect water conditions to thrive. To give them a strong chance of survival, create deeper sand beds for them to anchor. They do not ship well and are one of the more difficult anemones to maintain.

Popular Bubble Tip Anemones

Black Widow Bubble Tip Anemone

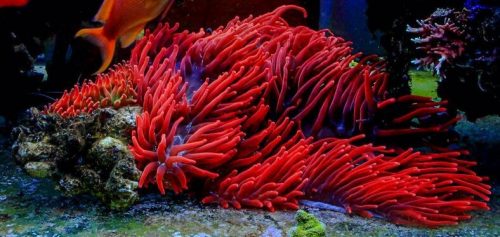
Black widow bubble-tip anemones are incredibly rare and can cost hundreds of dollars to acquire.

They have a striking blood-red color, which provides a beautiful contrast. Pair this anemone with contrasting fish in your reef tank for maximum effect.                                                                                            

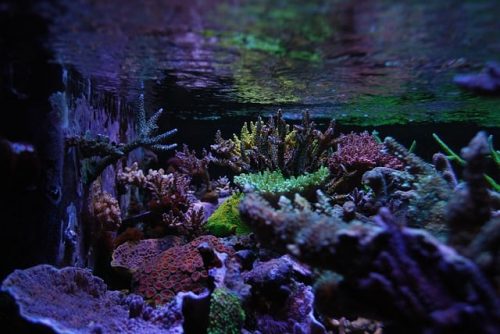
Green Bubble Tip Anemone

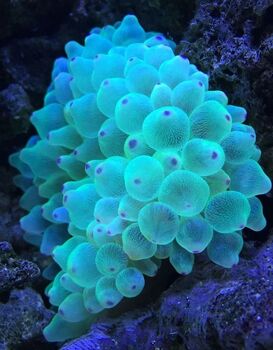
Green bubble-tip anemones are incredibly affordable and readily available. 

The tentacles have a distinct greenish-blue color that blends in nicely with surrounding rocks and foliage. Under the right lighting, they can produce a pleasant and calming glow.

Rainbow Bubble Tip Anemone

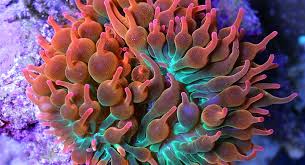
Rainbow bubble-tip anemones are an impressive variety of anemone as they have a vibrant neon blue base that fades into a rose color on the tentacles tips.

This beautiful variety can be expensive but adds lots of exotic color to your reef tank.

Rose Bubble Tip Anemone

Rose bubble-tip anemones are even more common than the green-tipped variety. What’s more, they are prolific propagators.

Because of these factors, they are popular with saltwater aquarists since they are readily available, easy to sell after propagation, and make an excellent option for first-time hobbyists.

Propagating Bubble Tip Anemones Can Be Profitable

Bubble-tip anemones are one of the best species of anemones for saltwater aquarists to propagate. These creatures are in high demand in pet stores, and many aquarists are happy to buy domestic anemone splits as these tend to do better in reef tanks than wild splits.

The reasons why these creatures split vary, but the two main reasons are:

  • Feeding-induced splits
  • Stress-induced splits

Let’s delve deeper into these splits to help you understand them better.

The Right Way: Feed-Induced Splitting

Proper and regular feeding is an excellent way to get anemones to split faster. The nutrients help them to grow well and split naturally, which leads to sound propagation. 

The more you feed your bubble-tip anemone, the faster it will grow. Provide small snacks each day until your specimen reaches approximately 12 inches in size, at which point in growth it will naturally split into smaller pieces that you can propagate.           

This video shows a time-lapse of an anemone splitting naturally, for your reference.

The Wrong Way: Stress-Induced Splitting

As with any animal, when stressed, anemones trigger a survival instinct and split to preserve themselves.

Excessive splitting may confuse amateur aquarists if they mistake it for thriving. Should this happen with your bubble-tip anemone, check the salinity, lighting, or nutrient levels in the water since these may be off, leading your bubble-tip anemone to be splitting like crazy.

As much as possible, use feed-induced splitting if propagating your anemone, because stress-induced splitting is cruel on the invert.   

Bubble Tip Anemone Quarantine

Anemones are some of the most relaxed animals to keep as they do not host parasites. These creatures lack the hard surfaces for parasites to hold on to, and many parasites can’t survive the creature’s sting.

Because anemones only host free swimmers, any parasites will die in approximately 16 days in a quarantine system without fish, which is less than the standard 45-76 days recommended for coral quarantine.

Bear in mind that you’ll need to have all the lighting and water parameters correct, and be sure to cover all powerheads and filters since the bubble-tip anemone will move during the quarantine.

Some aquarists prefer not to quarantine their anemone, but we do not recommend this course of action. If you prefer not to isolate your anemone, rinse the invert in the display water to get as much of the former tank water out of it—and then drop it into your reef tank.

Bubble Tip Anemone Care: Conclusion

Bubble-tip anemone care is manageable and is something aspiring aquarists should try.  These creatures are low activity (which makes them easier to care for), mesmerizing to look at, and bring exotic, vibrant color to your home.

Ensure that you follow the recommended feeding, lighting, water, flow, and selection guidelines to keep your bubble anemones thriving.

If you have any queries on any of the points we’ve covered in this guide or if you are still on the fence about getting bubble-tip anemones and need more convincing, we’d love to hear from you!

Best of luck in giving the best care to these beautiful creatures.

source https://aquariumlabs.com/bubble-tip-anemone-care/

15 Best Reef Safe Fish for Saltwater Aquariums

Yes, we know your struggle. Whenever you find yourself strolling through a local fish store, it’s always a struggle to stop yourself from just picking out the best reef safe fish in your favorite color and species and taking it home.

However, various fish species have different requirements in order to live comfortably. Having the proper equipment is essential so you can enjoy your pet and so your pet can enjoy the surroundings you provide for the years to come.

None of the fish species on this list need a tank size of more than four feet (except the Midas Benny), and none are known to damage corals in your aquarium. For the most part, these fish don’t have special dietary requirements, and they rarely behave aggressively even when competing for a mate.

Most of these species are also tank-bred, meaning they’re easy to keep in a home aquarium and very adaptable to different temperatures and water qualities.

Image

Fish Name

Max. Size

Min. Fish Tank

Link

Clownfish

3″

20 Gallons

Banggai Cardinal

3″

30 Gallons

Pajama Cardinalfish

4″

30 Gallons

Orchid Dottyback

4″

30 Gallons

Black Molly

3″

20 Gallons

Royal Gramma

3″

30 Gallons

Mandarinfish

3″

30 Gallons

Blue Green Chromis

3.5″

30 Gallons

Bicolor Blenny

4″

30 Gallons

Firefish Goby

3″

10 Gallons

Six Line Wrasse

3″

30 Gallons

Watchman Goby

3″

30 Gallons

McCosker’s Flasher Wrasse

3″

55 Gallons

Midas Blenny

6″

30 Gallons

Azure Damselfish

2.5″

30 Gallons

15 Most Beautiful Reef Safe Fish for Saltwater Aquariums

The following 15 fish are capable of living harmoniously in a reef tank.

1. Clownfish

ClownFish

Buy Clownfish!

  • Minimum tank size: 20 gallons
  • Maximum fish size: 3”
  • Temperament: Mostly peaceful
  • Lifespan: 3 – 5 years
  • Diet: Omnivorous

Star of the memorable Pixar movie Finding Nemo, the clownfish has become one of the best reef safe fish and is popular with aquarium owners the world over. The clownfish is easy to keep as long as you don’t mix two clownfish species in the same tank. The clownfish’s diet consists mostly of plankton, small crabs and crustaceans, algae, and worms.

The clownfish doesn’t need a mate to survive in a habitat. It will visit all the available space in your tank if kept by itself, and it will eat most dried, frozen, and fresh food offerings. The clownfish is a great beginner fish for a first-time aquarium owner.

2. Banggai Cardinalfish

Banggai cardinalfish (Pterapogon kauderni).

Buy Banggai Cardinalfish!

  • Minimum tank size: 30 gallons
  • Maximum fish size: 3”
  • Temperament: Mostly peaceful
  • Lifespan: 2.5 – 3 years
  • Diet: Carnivorous

The Banggai Cardinalfish’s striped and slightly spotted appearance can bring a different feel to any reef or tank. This mostly peaceful fish will not dart around your tank like the clownfish. However, you should not mix pairs that have not been mated in one tank, especially when there’s little territory to fight over.

Their diet consists mostly of small crustaceans or copepods like krill. They are slow to take to manufactured flakes and pellets. However, once they get used to you feeding them, they will eat at your designated feeding times.

3. Pajama Cardinalfish

Pajama cardinalfish (Sphaeramia nematoptera).

Buy Pajama Cardinalfish!

  • Minimum tank size: 30 gallons
  • Maximum fish size: 4”
  • Temperament: Mostly peaceful
  • Lifespan: 4 – 5 years
  • Diet: Carnivorous

The Pajama Cardinalfish is a hardy species that originates from the Great Barrier Reef and can be found across the Western Pacific seaboard. The fish is nearly identical to the Banggai Cardinal when it comes to breeding possibilities, and it will swim along with the other fish in your tank. Some aggression has been observed when Cardinalfish split off into pairs while breeding, but in a big enough tank, aggression shouldn’t be a problem.

Like the Banggai, the Pajama Cardinalfish is slow to accept manufactured flakes or frozen food. Offer defrosted Mysis shrimp or brine shrimp to start, and then mix in increasing servings of flakes.

4. Orchid Dottyback

small fish Pseudochromis Fridmani close-up

Buy Orchid Dottyback!

  • Minimum tank size: 30 gallons
  • Maximum fish size: 3”
  • Temperament: Somewhat territorial
  • Lifespan: 5 – 7 years
  • Diet: Carnivorous

The Orchid Dottyback, also known as the Strawberry Dottyback and the Purple Dottyback, is mainly found in the warm Red Sea. Caring for them is easy, but you need to provide a few hiding spots in your tank so they don’t feel the need to defend their territory.

Coming in at 7 cm (about 2.8 inches) in a bright purple color, Orchid Dottybacks can be eaten by Lionfish, Eels, and Snappers, so avoid mixing them in a tank. Their diet consists of krill, brine shrimp, and other copepods. They will get used to frozen and flake foods at a moderate pace, so consistency is key.

5. Black Molly

Black Molly (Poecilia sphenops)
Image credit: colors-farm.com
  • Minimum tank size: 20 gallons
  • Maximum fish size: 3”
  • Temperament: Mostly peaceful
  • Lifespan: 3 years
  • Diet: Omnivorous

The Black Molly originates from Central and South America and is commonly seen along the coasts of Venezuela and the beaches of Mexico. The species’ hardiness and low maintenance requirements make it one of the most popular tank fishes for aquarium owners.

Ensure that the hard, alkaline water in your tank has good quality. Also, be sure that the sexes are in equilibrium. Females tend to get harassed when outnumbered by males, and males may develop aggression among themselves. Feed a mix of vegetables along with flakes, frozen bloodworms, and brine shrimp.

6. Royal Gramma

Royal Gramma, {Gramma loreto} is commonly seen in the Bahamas, and is very territorial next to the coral

Buy Royal Gramma!

  • Minimum tank size: 30 gallons
  • Maximum fish size: 3”
  • Temperament: Mostly peaceful
  • Lifespan: 5 – 6 years
  • Diet: Carnivorous

The Royal Gramma is one of the most vibrant and attractive species to feature in any aquarium. The fish are not easily infected by most diseases and are friendly to other fishes. Their hardiness, accessibility, and long lifespans make them an easy starter fish for aquarium beginners.

Keep your Royal Gramma in a tank with lots of hiding places so they can feel secure. Their diet is mostly plankton, and they will eat the occasional parasite picked from the skin of bigger fish. Always feed a varied diet even when switching to pellets and flakes.

7. Mandarinfish

Small tropical fish Mandarinfish close-up. Sipadan. Celebes sea
  • Minimum tank size: 30 gallons
  • Maximum fish size: 3”
  • Temperament: Mostly peaceful
  • Lifespan: 2 – 5 years
  • Diet: Carnivorous

The Mandarinfish, also known as the Mandarin Dragonet, originates from the Pacific Ocean and has been found in many areas of Australia all the way to the Ryukyu Islands. Vibrant blue stripes make these fish colorful additions to any aquarium.

Mandarinfish spend their time hanging around on the floor of your tank, peacefully coexisting with other fishes. However, males can still fight among themselves, so they should be kept in pairs or on their own. They will eat frozen foods like Mysis shrimp or brine shrimp.

8. Blue Green Chromis

Blue Green Chromis

Buy Blue Green Chromis!

  • Minimum tank size: 30 gallons
  • Maximum fish size: 3.5”
  • Temperament: Peaceful
  • Lifespan: 8 – 15 years
  • Diet: Omnivorous

The Blue Green Chromis is found in the warm waters of the Pacific Ocean off Madagascar, Indonesia, Sri Lanka, and the Philippines, and in the Red Sea. They can live in lagoons and reefs, where they swim in schools that provide quite the visual feast during spawning season when their scales turn yellow.

The Blue Green Chromis is one of the most peaceful additions you can make to your tank, and the fish will leave your rocks, corals, and other fish alone. An omnivorous species, the Blue Green Chromis should be fed primarily meats like brine shrimp, krill, and Mysis shrimp.

9. Bicolor Blenny

Ecsenius bicolor - Flame tail blenny - saltwater fish
  • Minimum tank size: 30 gallons
  • Maximum fish size: 4”
  • Temperament: Peaceful
  • Lifespan: 2 – 4 years
  • Diet: Herbivorous

The Bicolor Blenny gets its name from its family, Blenniidae, and its two colors, blue and orange. The species needs an aquarium with big and small rocks to provide security. This fish loves to hide and perch, and it rarely causes damage to clams and corals unless it is underfed and begins feeding on fleshy parts and mantles.

Although peaceful toward most species, the Bicolor Blenny can pick fights with other blennies and dartfish. A plant-based diet is best, and frozen and dried blue-green algae are favorites. The Bicolor Blenny will help control the level of algae in your aquarium.

10. Firefish Goby

Firefish Goby

Buy Firefish Goby!

  • Minimum tank size: 10 gallons
  • Maximum fish size: 3”
  • Temperament: Peaceful
  • Lifespan: 3 – 4 years
  • Diet: Omnivorous

The Firefish gets its name from the red streak that intensifies as it runs along the back, and the fish ranks among the coolest reef safe fish. Originating from the Pacific and the Indian Ocean, Firefish are also found along the Maldives, Indonesia, and Africa. They will appear shy when you first put them in your aquarium, but they will be quite active later on, earning their moniker of “dartfish.”

Though peaceful neighbors to other fish, Firefish can fight among themselves. They thrive on a diet of frozen and meaty foods like Mysis shrimp, along with plankton and other copepods.

11. Six Line Wrasse

six line wrasse in the coral reef

Buy Six Line Wrasse!

  • Minimum tank size: 30 gallons
  • Maximum fish size: 3”
  • Temperament: Semi-aggressive
  • Lifespan: 10 years
  • Diet: Carnivorous

The Six Line Wrasse is a bright purple and yellow fish. Aquarium owners appreciate the fish’s hardiness and penchant for eating pests like bristle worms, flatworms, and pyramidellid snails. The Six Line Wrasse also loves cleaning fellow fishes by eating parasites off their scales.

In their natural habitat, Six Line Wrasses mostly consume small crustaceans, fish eggs, and mollusks. They are categorized as semi-aggressive because they will successfully compete with Mandarinfish for food from live rocks and will bully passive, introverted fishes like the Flasher Wrasse, Grammas, and Firefish.

12. Watchman Goby

Watchman Goby

Buy Watchman Goby!

  • Minimum tank size: 30 gallons
  • Maximum fish size: 3”
  • Temperament: Peaceful
  • Lifespan: 3 years
  • Diet: Carnivorous

The Watchman Goby, commonly known as the Yellow Shrimp Goby or the Yellow Prawn, is battened-down security guard for its territory. This reef safe saltwater fish likes to sit and watch for competition around its burrow, which is an attitude it will bring to the aquarium. The goby works perfectly with its partner Pistol Shrimp in defending their territory while making sure they have ample food to eat.

The Watchman Goby will take a day or two to get used to a new feeding pattern but will eventually love Mysis shrimp, brine shrimp, and other frozen food and flakes.

13. McCosker’s Flasher Wrasse

Mccosker Flasher Wrasse
Image Credit: artisticoceans.com

Buy McCosker’s Flasher Wrasse!

  • Minimum tank size: 55 gallons
  • Maximum fish size: 3”
  • Temperament: Peaceful
  • Lifespan: 3 – 5 years
  • Diet: Carnivorous

The McCosker’s Flasher Wrasse originates from the western regions of the Pacific Ocean and the Indian Ocean and can be found in colorful communities throughout the world, including the Maldives, Africa, Bali, and Australia. The Wrasse will habitually inhabit the bottom of your tank and will swim among groups of other fish.

In general, this fish is very friendly and loves a big tank. At times, the Wrasse can be aggressive when competing for space with other fish that are eating plankton. The fish will thrive on brine shrimp, Mysis shrimp, mussels, and clams, though it also will like a helping of seaweed once in a while.

14. Midas Blenny

Midas Blenny

Buy Miday Blenny!

  • Minimum tank size: 30 gallons
  • Maximum fish size: 6”
  • Temperament: Peaceful
  • Lifespan: 5 – 8 years
  • Diet: Omnivorous

Midas Blennies get their name from their fish family, Blenniidae, and their bright-to-deep gold color, as if they’ve been touched by King Midas himself. They thrive in big, spacious reef tanks. With the blue hues under their chins and their blue sclera, they are very attractive to watch. They’re one of the most beautiful reef safe fish you can own today.

If you plan on buying this fish, make sure your tank has some rocks because Blennies love perching and hiding among them. The Midas Blenny is generally peaceful but is known to nibble at Gobies and Firefish when confined in small spaces. A good diet consists of Mysis shrimp, brine shrimp, and blue-green algae.

15. Azure Damselfish (Kupang Damsel)

Azure Damselfish (Chrysiptera hemicyanea).

Buy Azure Damselfish!

  • Minimum tank size: 30 gallons
  • Maximum fish size: 2.5”
  • Temperament: Semi-aggressive
  • Lifespan: 15 years
  • Diet: Omnivorous

The Azure Damselfish originates from the western Pacific Ocean and the Indian Ocean and can be found off the coast of Indonesia and the northwest parts of Australia. When first added to your aquarium, the Damselfish might appear quite shy and passive, but later you will know why it’s called a dartfish.

The Azure Damselfish will love an aquarium with plenty of live rocks and decorations. Hardiness and tolerance for poor water quality make this fish a good choice for budding aquarium enthusiasts. However, the Azure Damselfish is classed as semi-aggressive because adults can be territorial against more introverted fishes.

A good diet consists mostly of Mysis shrimp, brine shrimp, and an assortment of frozen meats, with some dried seaweed now and then.

source https://aquariumlabs.com/best-reef-safe-fish/

DIY Aquarium

DIY Aquarium

From gardening to getting in shape to painting the master bedroom pink, Covid-19 is to blame for an uptick in do-it-yourself (DIY) projects in homes across the globe. DIY aquariums are no exception. We think building an aquarium is well worth your social-distancing time.

If you’re new to owning aquatic animals—either freshwater or saltwater—there’s a lot to know about getting a tank up and running. We’ll show you an easy, cost-effective, and creative way to build the aquarium of your dreams.

Planning Your Aquarium

First, you must consider how large you’d like your aquarium, and that depends on what animals you wish to house there. The general rule of thumb is, bigger is better, as there aren’t too many downsides to a big tank. However, a too-small aquarium can be devastating to your animals. Here are the minimum requirements we recommend for your DIY aquarium:

  • Freshwater Fish Aquariums: Even for the easiest-to-care-for freshwater fish, we recommend at least a 10-gallon aquarium. The perfect fish for new hobbyists, for example, are typically danios, guppies, tetras, cory cats, and goldfish, all of which thrive in 10-gallon tanks. You could squeak a beta fish into a smaller tank, but betas aren’t social fish and should remain alone. If you want an active aquarium, we recommend a 10-gallon aquarium as the smallest size for your DYI build, with dimensions of 22” x 12” x 13.5.”
  • Saltwater Fish Aquariums: Saltwater fish require more room than the typical freshwater fish, even for the most common and hardy species like dottybacks, gobies, tangs, and wrasse. Little Nemo might not mind a 20-gallon tank, but since clownfish like company, a 30-gallon would still be best. We recommend a 55-gallon tank or bigger for your DIY aquarium.
  • Reef Aquariums: While similar to standard saltwater tanks, reef aquariums need even more room for their corals and anemones to grow and spread, as well as more volume to balance out the water chemistry. Reef aquariums often include fish from saltwater tanks, scavengers like crabs and snails, and invertebrates like shrimp and sea urchins. The perfect size for a beginner’s reef aquarium is 120 gallons.
  • Aquariums for Small Lizards, Snakes, and Turtles: While larger reptile species may be better suited for different types of cages, aquariums can make very nice homes for smaller varieties. Small turtles can do well in 20 – 30-gallon tanks, but when as soon as their shells grow larger than three inches, they’ll need more space.

Snakes similar in size to ball pythons and kingsnakes can do well in 20-gallon tanks, and smaller varieties of boa constrictors and blood pythons can live temporarily in your DIY aquariums. Still, once snakes reach five feet or longer, they should be housed in reptile cages customized to their species.

Finally, small lizards like green anoles and geckos are well-suited for aquarium living. Owners just need to make sure they have a screened lid that fits securely around the top edges so no animals can escape. Basking lamps placed directly on top of these screens help prevent escapes. 

Deciding On Your Materials

When it comes to buying the materials for your DIY aquarium, we highly recommend tempered glass over acrylic. While there are advantages to acrylic, building your aquarium with glass ensures your efforts pay off in the end—and for a long time to come.

Acrylic is lighter and stronger than glass, and you can customize it into nearly any shape you wish. That might sound great, but let’s explore what this means for you. If you want to build a huge tank, yes, weight matters. Not only is glass heavy, but a 100-gallon tank filled with water, fish, and rocks can easily weigh over 400 lbs. Acrylic would be half as heavy. But, are you planning to build an exceptionally large tank?

Probably not.

And if not, the benefits of buying acrylic end there. Acrylic is expensive, scratches easily, and turns yellow with age. If you think of all the rocks, sand, and underwater decorations bound to be inside your amazing DIY aquarium, you’ll agree that building a custom aquarium out of acrylic sounds unappealing. There are simply too many opportunities to scratch the surface.

Preparing Your DIY Aquarium Plan

Now, you’re ready to design and build your aquarium. We recommend creating exact schematics for your aquarium or getting a professional to help with the measurements. Remember, you’ll construct your aquarium to hold water, so precise measurements mean no leaks.

Leave the top of your aquarium open to allow for a lighted hood. You need glass for the bottom, front, back, and two sides of your aquarium. Additionally, you need:

  • Single-edged razor blades
  • Acetone
  • Non-toxic, 100% silicone sealant, such as All-Glass Brand 100 Percent Silicone Sealant
  • Paper towels
  • Washable felt-tip marker
  • Duct tape or painter’s tape
  • Sandpaper

Putting Your Plan in Action

Once you’ve cut the glass for your DIY aquarium, make sure to take sandpaper to the edges and buff them for any raw, sharp edges. Then, clean the outside edges of the glass with a small amount of acetone on a paper towel. Cleaning ensures that the silicone sticks to the glass properly.

Next, you will line the near-edge of your glass with tape. Watch this video to see exactly how it’s done.

If the tape comes away from the glass during building, dab a drop of acetone onto another paper towel and wipe the area clean. Then, add a new piece of tape.

As you will see in the video above, once you have all of your materials prepared, lay out the glass panels in the exact placement in which you will be building them. Make a note of which edges go where using a felt-tipped marker. A combination of arrows and directions works well (up, down, outside, inside). Marking the orientation of the panels ensures you don’t make a mistake or get frustrated.

Tips for Installation

You will use the same technique to install each glass panel in your DIY aquarium. After you watch the video, but before you begin, read these tips to keep the job as flawless as possible:

  • While installing your glass panels, particularly the first, front panel, it is helpful to have someone nearby for assistance.
  • Have five-to-six pre-cut strips of duct tape within easy reach. Use these to secure the freshly installed panels to one another and avoid any problems with tilting glass.
  • When you apply the silicone to each inside edge of all the panels you will be joining, make sure the line is solid and do not wipe off any excess. You can always clean up any silicone that has seeped through the edges after the silicone has cured.
  • When installing a glass panel, align the panel with the silicone and then, at a slightly forward angle, push it into the silicone before tilting the panel upright and pressing it firmly into the bottom panel. This technique will help ensure a tight fit.
  • After fitting the panels together, go back and fill each of the eight joints where the panels come together. Then, run your thumb over the silicon in each seam, ensuring a secure seam.
  • Let your new DIY aquarium cure for a full 12 hours. Then, fill the tank with water to check for leaks. Leave it for another 12 to 24 hours to guarantee a job well done.

Since you’re stuck at home, use this newfound knowledge to build your first DIY aquarium. You’ll have plenty of time to enjoy it.

source https://aquariumlabs.com/diy-aquarium/

Best Reef Salt Mix – Selecting the Best Salt for Your Tank

best reef salt

All budding reef tank enthusiasts (also known as “reefers”) share one common passion: discussing which reef salt mix reigns provides the optimal environment for reef tank growth. The opinions are very divisive, and the discussions quickly become emotionally charged and unproductive.

The truth is, finding the best reef salt mix is a combination of science, experience, circumstances, and trial and error. 

Most reef salt mix manufacturers brag about the quality of their mixes, superior balance of calcium and alkalinity, and top-notch trace elements. In reality, most of the premium-brand reef salt mixes are high-quality products that have pros and cons. But what suits one tank best, might be a poor fit for another.

In this guide, we will explain the facts about what are, in our opinion, the best reef salt mixes on the market and give you our recommendations.

Choosing the Best Salt Mix for You

The first thing to understand is that the perfect reef salt mix for your tank is a personal preference. To be sure, the type of reef salt mix you will use in your tank depends on the size of your tank, the type of coral you are using in it, and the species of fish you are keeping. However, you are probably going to find several competing products that fit within all of these parameters.

This is where your own personal experience and preferences come into play. What is your budget? What is the ideal balance of calcium and alkalinity you are looking for? These are just some of the questions that might help you choose. More likely, you will go with a brand that you are comfortable with or had a positive experience with in the past.

Remember, the perfect reef salt mix does not exist, and even the best ones are not always optimal for everybody’s needs.

Natural vs. Synthetic Salt Mix for Reef Aquariums

All reef salt mixes are either mined (natural) or synthetic. Natural or mined reef salt is a byproduct of mined evaporated seawater ocean deposits. As such, mined reef salt mixes have the distinct characteristics of the mined area but can often show variance in the content and major ingredients.

Reef salt mixes that are 100% synthetic or majority synthetic have a more controlled production process, stability of ingredients, and are some of the most expensive reef salt mixes on the market. Manufacturers can also infuse those mixes with other trace elements that they believe will improve the quality of the mix and its effect on the water in your tank.

Reef Salt Mix Major Elements

All reef salt mixes in the market consist of hundreds of unique elements. Yet, when it comes to choosing the right reef salt mix for your aquarium, there are three major elements that you have to keep in mind:

  1. Calcium – Calcium is the building block of the coral reef, and without it, the coral will not be able to expand its skeleton and grow. Biomineralization is the process which enables the coral to use calcium and create a hard skeleton from it. Ideally, reef salt mixes should contain around 400ppm of calcium. The more calcium there is in the mix, the lower the alkalinity of the water.
  2. Alkalinity – Alkalinity of seawater directly relates to the pH levels in the water and the presence of bicarbonate. Stable pH levels in the tank and the presence of bicarbonates ensure that the coral can grow freely. As long as alkalinity is between 8 and 11, your tank should be fine for coral growth.
  3. Magnesium – As the main catalyst that makes calcium interact with other trace elements to maintain alkalinity, magnesium plays an important role in keeping the tank water in perfect balance. The ideal magnesium levels range between 1,200ppm and 1,400ppm.

Best Salt for Reef Tanks

Image Product Type Size
Fritz Aquatics Reef Pro Mix Mined 200-Gallon
Instant Ocean Reef Crystals Mined 10, 25, 50, 160, 200-Gallon
Instant Ocean Sea Salt for Marine Aquariums Mined 10, 25, 50, 160, 200-Gallon
Red Sea Coral Pro Salt Mined 175-Gallon
Brightwell Aquatics Neomarine Salt Synthetic 150-Gallon
Fritz Aquatics 80280 Reef Pro Mix Complete Marine Salt Mined 50 Gallon
Tropic Marin Pro Synthetic 200-Gallon

Best Reef Salt Reviews

1. Fritz Reef Pro Mix

It seems that Fritz Reef Pro Mix is everywhere. From reefer forums to online retailers and reef enthusiasts, Fritz Reef Pro Mix certainly has strong brand recognition and great marketing. It has excellent availability as well, with countless online and brick-and-mortar retailers carrying the product (and often selling it for a discounted price).

This reef salt mix was the quickest mixing one we had a chance to review. It reaches optimal alkalinity levels very quickly and provides an excellent balance of calcium in the tank. Moreover, there are no caking agents present in this mix.

Yet, even this mix can hit a dead end, especially when it comes to hard coral, such as Acropora. It is better suited for LPS and mixed reef. Fritz Reef Pro Mix offers a perfect balance of quality ingredients, mixability, and price, making it our No. 1 choice.

Specs

  • Calcium – 400-450ppm
  • Alkalinity 8.0 – 8.5 DKH
  • Magnesium – 1,300 – 1,400ppm

Pros

  • Excellent balance of calcium and alkalinity, ideal for most tanks
  • Available in most local and online retailers
  • Excellent value for money when discounted
  • Perfect for those with LPS and mixed reef.

Cons

  • Expensive when at full retail price
  • Not suitable for Acropora corals

2. Instant Ocean Reef Crystals

Instant Ocean Reef Crystals is the best budget reef salt mix on the market. It is nearly impossible to miss, as it is one of the most popular reef salt mixes. It’s available in all the major retailers online, as well as pet supply stores.

The budget pricing of the Instant Ocean Reef Crystals does come with some drawbacks. With alkalinity of 13, this mix suits mixed reef and soft tanks best and might harm tanks with more sensitive coral. Additionally, anti-caking agents used in the Instant Ocean Reef Crystals can lead to a build-up of brownish crust on the tank walls, something that requires tedious cleaning.

Overall, Instant Ocean Reef Crystals is an excellent product for those on a budget, as long as you are aware of its limitations, and your tank fits its target profile.

Specs

  • Calcium – 490ppm
  • Alkalinity – 13 DKH
  • Magnesium – 1440ppm

Pros

  • Fantastic value for the price. The best budget reef salt mix
  • Excellent reputation and immaculate quality control
  • Easy to find in most retailers
  • High magnesium and calcium contents

Cons

  • Anti-caking agents create an unwanted build-up
  • High alkalinity harmful for more sensitive Acro-type coral
  • Suitable only for soft or certain types of mixed reef tanks

3. Instant Ocean Sea Salt

This is a big seller from Instant Ocean, a company with more than five decades of leadership in the industry. Instant Ocean Sea Salt is the most used sea salt product in the world. From huge public aquariums to hobbyists and enthusiasts, Instant Ocean Sea Salt’s quality and value speak for itself.

Taking that into account, Instant Ocean Sea Salt is not a perfect product. It performs best when used in fish-only tanks or fish tanks with live rocks or soft corals. It will not do well with hard corals, possibly even hurting them. The same issue that plagues Instant Ocean Reef Crystals persists here, the build-up of a tough brown residue that is tough to remove.

Still, being one of the most affordable brand-name sea salt products in the world with an unmatched track record and history in the industry, Instant Ocean Sea Salt is a great value even today. Many manufacturers have tried to beat out Instant Ocean Sea Salt with more innovative and quirky products, but Instant Ocean Sea Salt is still holding steady.

Specs

  • Calcium – 400ppm
  • Alkalinity – 11 DKH
  • Magnesium – 1,350ppm

Pros

  • Affordable
  • One of the quickest mixing salts
  • Perfect for fish-only or fish with soft coral tanks
  • The most popular sea salt on the market, available everywhere

Cons

  • Not ideal for hard corals
  • An issue with anti-caking agents (creates brown residue build-up)

4. Red Sea Coral Pro Salt

If you are looking for a reef salt mix that is 100% natural and perfectly mimics actual seawater conditions, then look no further than Red Sea Coral Pro Salt. The salt that goes into this mix comes directly from the Red Sea, so it’s no wonder that this is one of the highest quality mixes on the market.

Most frag sellers and SPS tank owners swear by the Red Sea Coral Pro Salt, insisting that it is the only solution available with stable alkalinity and balanced levels of calcium and magnesium conducive to SPS growth. It is also an eco-friendly product that does not use any harmful chemicals.

The only real downsides of this product are its price, which is not cheap, and its availability. It might be challenging to get your hands on one of these unless you have a specialty, marine supply store near you, or you order it online.

Specs

  • Calcium – 450ppm
  • Alkalinity – 12 DKH
  • Magnesium – 1340ppm

Pros

  • The best reef salt mix for SPS tanks
  • 100% natural, harvested salt from the Red Sea
  • Eco-Friendly
  • Firm quality control and brand reputation

Cons

  • Quite expensive
  • Difficult to get ahold of

5. Brightwell Aquatics Neomarine Salt

Brightwell Aquatics is the brainchild of Chris Brightwell, the former owner of Kent Marine. The brand prides itself on its extensive research and testing (carried out in real-world marine environments) as the core part of their product development process.

Brightwell Aquatics Neomarine Salt is a product that most SPS tank owners will find appealing. Its low alkalinity is stable and conducive to SPS coral growth. Additionally, the alkalinity of this mix is not prone to spikes. Since this is not an evaluated alkalinity product, the alkalinity continuously sticks to 7.5 to 8.0 DKH. On top of all that, Neomarine Salt does not have any anti-caking agents.

Similar to previously mentioned Red Sea Coral Pro Salt, the price tag is what turns most people off. The mix is by no means affordable, but still a high-quality product. Product distribution and availability are also an issue, although not to the level of Red Sea Coral Pro Salt.

Specs

  • Calcium – 413ppm
  • Alkalinity – 7.5 DKH
  • Magnesium – 1,290ppm

Pros

  • Perfect for SPS tanks, due to low alkalinity
  • No anti-caking agents
  • Endorsed by large coral dealers
  • Created by an industry veteran with marine experience

Cons

  • Expensive
  • Not readily available in retail outlets

6. Fritz Aquatics 80280 Reef Pro Mix Complete Marine Salt

Fritz Aquatics 80280 Reef Pro Mix Complete Marine Salt is one of the best all-around reef salt mixes available today. Whether you have a fish-only tank or you also keep different types of reef coral in the tank, 80280 Reef Pro Mix is up to the task.

Designed by marine specialists and professionals, 80280 Reef Pro Mix has gone through extensive testing, ensuring that it is safe for marine life. It is an ammonia-, phosphate- and nitrate-free product that is gentle on sea life. The product quickly mixes with water and reaches the needed pH levels in no time. 

Although not a budget product, 80280 Reef Pro Mix is an affordable one and a great value, easily found in retail outlets.

Specs

  • Calcium – 450ppm
  • Alkalinity – 8.5 DKH
  • Magnesium – 1,350ppm

Pros

  • Excellent all-around reef salt mix
  • Balanced formula with enough calcium and magnesium for coral growth
  • Excellent for beginner hobbyists, just getting into reef tanks
  • Quick dissolving mix

Cons

  • There are better products out there for each tank type
  • Reef Pro has a shady quality control history

7. Tropic Marin Pro Reef Salt

If you are looking for the absolute best SPS tank reef salt mix and are willing to spend the necessary funds to get it, Tropic Marin’s Pro Reef Salt is the product you are looking for. A fully-synthetic blend—created with pharmaceutical precision of ingredients and elements—it delivers perfect conditions for SPS corals to grow.

Tropic Marin is the premium brand of marine supply products, particularly in Europe. The mix is ready out of the box and delivers instant performance, as it mixes quickly with the water. Water changes are not a cause for worry, as the alkalinity levels will remain stable and your fish and marine life will be safe and sound.

The price of all this might be astronomical for some, but the product targets enthusiasts that will spare nothing to get a perfect reef tank. On top of that, the product is not easy to find, and you either have to order it online or find it in a specialty store.

Specs

  • Calcium – 450ppm
  • Alkalinity – 8.5 DKH
  • Magnesium – 1,380ppm

Pros

  • The absolute best SPS tank reef salt mix on the market
  • High-quality, fully-synthetic reef salt mix
  • A perfect blend of ingredients that stimulates healthy growth
  • A renowned brand with decades of experience                                                                                                                                                             

Cons

  • Extremely expensive
  • Difficult to find in regular retail stores

Reef Salt Frequently Asked Questions (FAQs)

In this section, we will try to answer some of the most common questions you might have about reef salt mixes.

Where Should I Buy Reef Salt Mix?

Reef salt mixes are available in local brick-and-mortar marine shops and pet supply chain stores. Typically, you can purchase them in either small amounts or in bulk. The other option is online retailers such as Amazon or specialty retailers.

A lot of online pet and fish supply retailers have stopped carrying reef salt mixes, due to the inability to ship them efficiently and still turn a profit. High shipping costs seriously affect the bottom line for these companies. Therefore, only giants like Amazon can use economies of scale to make a profit.

How Do I Mix Saltwater for My Aquarium?

Mixing saltwater for the tank sounds way more complicated to beginners than it really is. Once you have done it a few times, the process will feel natural and comfortable.

It all starts with a RODI (reverse osmosis deionization) system you will use to prepare your saltwater, along with a refractometer and a 35ppm calibration fluid. Pay close attention to the water temperature, because you want to perform all the measurements as close to the ideal water temperature as possible.

After the water is at the ideal temperature, you turn on a return pump or wavemaker and start adding salt according to the instructions of the reef salt manufacturer. You are aiming for a 35ppm (or 1.026) concentration. Whenever you add salt, make sure to wait for 30 minutes before taking salinity measurements. Some reefers prefer to leave the mix overnight and take measurements in the morning before changing the water.

Now you know how to mix saltwater.

What is the Best Reef Salt to Use?

This question does not have a simple answer. The best reef salt will vary depending on the type of tank (fish-only, fish with live rocks, SPS/LPS reef tank, or mixed reef tank) you have, as well as the type of marine life in it.

How to Choose Reef Salt Mix for Your Aquarium?

There are several factors you have to consider when choosing the right reef salt mix for your aquarium:

  • Ingredients (the big three are calcium, magnesium, and alkalinity)
  • Per gallon cost of the mix
  • Type of tank and marine life in it
  • Brand reputation and quality control

Make sure that you carefully read the ingredients of all reef salt mixes you are considering and that they match the requirement of the reef you have in your tank. Stable, low alkalinity is crucial for coral reef growth, as well as the abundance of calcium and magnesium.

The cost of the mix is essential. Premium brands and products can set you back a hefty sum, so finding the optimal combination for your budget is crucial. Finally, stick to the brands with a proven track record and dedication to research, testing, innovation, and quality control.

How Much Salt Per Gallon for Reef Tanks?

The amount of salt per gallon for reef tanks depends on the type of tank, the marine life in it, and the reef salt mix brand requirements. So, make sure to follow the instructions provided by the manufacturer closely. On average, 35 grams of reef salt mix per liter, or 132 grams per gallon, is the ideal mix for reef tanks.

Our Recommendations for Reef Salt Mix

Ultimately, the type of coral you would like to keep determines the best reef salt mix. This list can act as a quick reference regarding the products we mentioned and what makes them a great buy:


source https://aquariumlabs.com/best-reef-salt/

Current USA Orbit Marine Aquarium LED Light Review

We’re no stranger to aquarium lighting, and we know it isn’t just for show.

Yes, lights look striking. They make your fish tank magically glow in the dark, creating a colorful atmospheric feature in the room. Lights also serve a practical purpose, though. Proper lighting helps your fish, plants, and coral flourish.

We’ve been exploring many different aquarium lights so we can report back to you the various options at your disposal. That way, you can make the most informed choice for your needs. LED lights are not only the strongest option for illuminating your fish tank, but they’re also safe and economical.

Today, we’ll highlight the features and key benefits of the Orbit Marine Aquarium LED light manufactured by Current USA. Current USA designed this aquarium light specifically for marine tanks.

The light is suitable for beginners and experts alike, but we feel that beginners will benefit most from this light due to its super simple set-up.

We tested this light for six months. Therefore, this Current USA Orbit Marine Aquarium LED Light review should give you an accurate idea of how this LED light stands up to the competition.

So, let’s get down to business.

Current USA Orbit Marine Aquarium LED Light Review – Product Features and Specs

Easy to Program and Control

The USA Orbit boasts a crisp, intuitive control panel. The button controls are clearly marked and self-explanatory. It’s simple to turn the light on and off. You operate a standard infrared wireless remote by pointing at the light and turning it on just like a TV or DVD player.

What Is a Ramp Timer Pro?

The remote control communicates with a device called a Ramp Timer Pro. This device acts as a bridge to the LED lights. The white light channel works best for daylight effects while the blue light channel is ideal at night.

This LED light controller offers a range of settings. The Ramp Timer controller lets you time the light over 24 hours. You can also dim the lights and change the color.

The Ramp Timer Pro includes four dynamic fade modes. Employ these on-demand features using the remote to mimic common weather patterns, including:

  • Partly cloudy
  • Very cloudy
  • Fading moonlight
  • Storm with lightning

The controller offers other neat features and effects like moon pattern, lightning storm, and cloud cover. But, whatever you do, don’t lose it.

The Installation Process

We feel that this LED light is perfect for beginners since it’s not too complicated to set up.

It comes with the following items:

  • Remote control
  • 24” LED light (2 x single channel lights)
  • Standard power supply
  • Ramp Timer Pro with an infrared sensor which communicates with the remote control
  • 12-24VDC Transformer
  1. First, adjust the mount so that the light fits on top of the mount.
  2. Next, fix the Ramp Timer Pro to the side of the tank using Velcro. Keep it clear so the remote control can connect with it.
  3. Connect the LED lights to the Ramp Timer Pro by connecting the relevant wires.
  4. Connect the transformer to the Ramp Timer Pro and plug it into the mains supply.
  5. Press SET CLOCK.
  6. Press ENTER to set the time.
  7. Press TIMER M1 and TIMER M3 to complete the pre-programmed schedule.

The Ramp Timer Pro has five memory locations that store the color spectrum only. If you press M1, you can use the blue and white manual adjustment arrows to find the color spectrums you like. You can change the intensity of the channels shown on the LCD when you push the arrow buttons.

The last color settings are saved in the M1 memory and can be changed whenever you want.

Before you set the minimum and maximum lighting levels for the blue and white channels, you can utilize the Manual Color Spectrum Mode key (M1) at the top of the remote. This key allows you to manually adjust the intensity of the lighting for each channel on the LCD from 0-100%.

Two-Color Spectrum

Many aquarium LED lights reflect all the colors of the spectrum. This light offers only two. As we said, this light works best for beginners. But if you’re hoping to grow coral, consider a full-spectrum light instead. Although a two-color spectrum light won’t harm your coral, full-spectrum lights promote better growth.

That said, this light still gives off incredible illumination and will light up both fish and coral. It has vibrant two-spectrum colors. You’re also getting great value for money.

The wide-angle dispersion lenses in this light give off plenty of power considering the device’s small aluminum form factor.

Different Presets

The USA Orbit controller comes with several preset programs so you can just press a button for each setting. One setting runs a timer on the light for a 24-hour period. Tweak this setting to adjust the duration of the light. 

The timer also brightens and dulls to mimic sunset and sunrise. The controller allows you to change the intensity of the light to resemble moonlight, sunset, and sunrise, depending on your preference.

Adjustable Docking Mounts

There are no complicated hooks to install with this LED light. Instead, simply use the adjustable metal docking mounts.

It couldn’t be easier to get up and running. It’s far more straightforward than the hanging type of aquarium LED. The arms from the docking mounts slide in and out quickly. The mounts ensure a neat fit, no matter the size of your tank. Also, if you need to shift the aquarium, you won’t need to worry about moving ceiling hooks.

The only issue with the docking mounts is that they’re metal and prone to rust. That’s the only meaningful criticism we can level at this superb aquarium LED.

Warranty

This LED comes with a three-month limited warranty. In the unlikely event that you are dissatisfied with your LED light, contact any local retailer for a replacement part. Most dealers can do this, assuming your light is still under warranty and you have the original receipt.

If a local dealer can’t help you, you can mail the light to Current USA for repair or replacement. You should contact the company before sending the light. They may be able to answer your questions without the hassle of mailing.

Here’s an overview of the leading benefits and minor flaws of the Current USA Orbit Marine Aquarium LED Light review.

Pros & Cons

Pros

  • Simple to set up even for complete beginners
  • A wide range of attractive settings
  • 24-hour light timer for safety and convenience
  • Outstanding price/performance ratio
  • Brings out the eye-popping color in your fish and coral

Cons

  • Two-color spectrum light rather than full-spectrum
  • You can only operate it with the remote so don’t lose it

UPGRADE: The Pro Version of Current USA Orbit for Reef Tank LED Light

If you’re running a reef tank, why not upgrade to the Pro version to ratchet your aquarium lighting up a notch?

The Pro version of the Current USA Orbit for Reef Tank LED Light offers all the benefits of the Orbit LED light. In addition, the tank provides two strip lights instead of one. It also comes with a wave pump manifold in case you’re keeping corals.

Things to Consider Before Buying the Current USA Orbit LED Light

The dimensions of your aquarium should be your primary concern. This LED fits tanks sized from 48” to 60”. If your tank falls outside these parameters, look for a more compact light.

If you don’t cover your aquarium with a transparent lid, be mindful that the adjustable mount is metal and quite easily rusts.

If you’re planning to downsize your tank, you should consider an alternative LED light, as this one will be too bulky.

FAQs

What Type of Corals Work Best with This Product?

This LED light will work most effectively with low-maintenance corals such as LPS and low-maintenance SPS. If you’re after something to grow coral, a full-spectrum is a smarter choice.

How Far Will the Light Penetrate?

The Current USA Orbit LED Light can reach as far as 24”. For deeper aquariums, we recommend that you use two units side-by-side. Due to their compact and narrow features, you can easily configure a pair of lights.

Final Verdict

Overall, the Current USA Orbit LED Light is a reliable choice if you’re looking for an aquarium light for a regular tank. Since it’s so easy to set up, we’d particularly recommend this light for beginners. Anyone can work out how to plug it in and place it on top of the tank.

The controls are self-explanatory and fully customizable. The principal drawback is that you can only change the settings using the remote control. Don’t lose it, or you’ll be in trouble!

The different settings are exciting for the customer. The lightning effect is commanding, and we love the sunrise-to-sunset transition effect, too.

The light is strong enough for LPS corals but not for SPS corals. Nevertheless, your tank will look phenomenal as the colors are still bright and pop out.

In our opinion, the compact footprint and the simplicity of installation are the primary benefits of the Current USA Orbit LED Light.

Don’t forget to bookmark our site and pop back any time you want guidance on the best gear for your fish tank. See you soon!

source https://aquariumlabs.com/current-usa-orbit-marine-aquarium-led-light-review/

Kessil A80 Review – Tuna Blue LED Light w/ Mini Gooseneck Fully Reviewed

To get the colors of your aquarium popping, and your fish and reef to flourish, you need a solid lighting system.

We tested the Kessil A80 for a couple of months to see how it fared with our aquarium. We have to admit, the results were pretty positive.

We’re highly impressed with the sleek design of this powder-coated aluminum model. The build quality is commendable, and it’s one of the smallest LED light set-ups on the market. The seamless installation is the icing on the cake.

The Kessil A80 Tuna Blue LED Light with Mini Gooseneck is the company’s smallest LED to date. This light is perfect for nano reef tanks. For its size, it’s pretty impressive as it covers a full 24 inches. It comes with a neat cooling system baked in. You can change the color and intensity with ease.

To kick off our Kessil A80 review, let’s take a glimpse at the key differences between Kessil’s leading models.

Tuna Sun Vs Tuna Blue Key Difference

Should you opt for a Tuna Sun or a Tuna Blue, then? It depends on whether you’re running a marine/reef tank or a freshwater/planted tank.

While the Tuna Sun generates a good deal of light, it’s only suitable for small fish tanks with LPS coral. If you have SPS coral, you’re better off with Kessil’s A160 or A360 line.

Kessil A80 Tuna Blue Review

Design and Build

The Kessil A80 is quite heavy. Its high-end passive cooling system doesn’t have a fan, which means it’s completely silent.

This light is perfect for a tank in a bedroom or an office. You’re unlikely to get splash-back or salt creep with this LED.

The Kessil A80 Tuna Blue comes with the following bundled:

  • Light
  • Mount
  • Power adapter
  • Mini gooseneck

The LED light itself includes:

  • Power on/off buttons
  • Color intensity dial
  • Light intensity dial

The body of the light is compact and measures just 10mm across. The design is smooth and the rounded shape is stylish. The LED is made from powder-coated aluminum.

Although it’s small, this model packs the same power as Kessil’s heavier-duty models such as the A160 and A360 lights. It’s powered by 100-240V AC input and 24V DC output.

Like Kessil’s other models, the A80 incorporates a dial to control color. There’s another dial to manipulate the intensity. This new model comes with a 0-10v input for use with Kessil’s spectral controller or third-party spectral controllers.

A mini gooseneck screws into the LED light and attaches to the mount. This gives you full flexibility with placement.

The Lighting

You can expect the same quality of lights as you would with Kessil’s more powerful models. Due to its size, the A80 is better suited to smaller tanks or larger tanks containing only fish.

The Dense Matrix Array incorporates 15 LEDs covering colors including:

  • White
  • Blue
  • Magenta
  • UV

The light itself kicks out 15 watts, giving you plenty of bang for your buck. It’s a great way to brighten up your aquarium so you can enjoy your beautiful, shimmering aquatic display.

The Light Distribution

The Kessil A80 covers tanks between 14” and 24”. If you use the gooseneck to mount the Kessil A80, this will suspend the light at 15”, giving you decent coverage of a shallow reef tank. The light, high-quality lens and reflector maximize a broad spread of light so you can enjoy coverage of 24” at a height of 8”.

The A80 will give your aquarium 24” coverage if you have a large fish-only tank that only calls for low light. This is based on placing the LED between 6” and 8” above the water.

Pros

  • With a maximum power of 15 watts, the Kessil A80 generates strong light while remaining economical.
  • The mini gooseneck mount is versatile and allows you to fully customize its setting.
  • It’s small and perfectly formed. Measuring 4.88” across and 0.98” high, the A80 is one of the smallest LED aquarium lights on the market.
  • It’s simple to set up.
  • Comes with two tuning dials, one for color intensity and the other for light intensity.
  • Works well with rimmed or rimless tanks up to 1/8” thick.
  • Passive cooling system so runs whisper-quiet – ideal for a bedroom or office.

Cons

  • While the Kessil A80 kicks out a good amount of light, it’s not suited for medium or large aquariums.
  • Does not include pre-programmed settings.
  • Unfortunately, the Kessil A80 doesn’t give PAR readings.

The Kessil Tuna Blue A80 LED Frequently Asked Questions

Is there a timer on the Kessil Tuna Blue A80?

No, there is no timer.

Does the gooseneck fit any tank?                

The gooseneck mount will fit any tank with a rim of up 1/8”.

What are the power specifications for the Kessil Tuna Blue A80?

The power rating is 15 watts. The light runs on 100 to 240V input. The output is 24V.

Does the Kessil Tuna Blue A80 feature pre-programmed settings?

No. The Tuna Blue A80 only features two dials that you use manually. One dial is for color intensity and the other for brightness.

Final Verdict

The Kessil A80 Tuna Blue LED light is small, compact, and remarkably efficient. It delivers ample light for smaller reef tanks or larger, fish-only aquariums.

Its state-of-the-art passive cooling system is deadly silent. This means it fits neatly anywhere you need to sleep or concentrate. The gooseneck mount means there’s no need to suspend it from the ceiling, making installation a cinch.

Its sleek and compact powder-coated aluminum design makes a statement. It’s not bulky or unsightly like so many models glutting the market.

On the downside, the A80 lacks PAR reading. There’s no alarm or timer either. If you like preset weather settings, the A80 isn’t the best choice. That said, the manual tuning dials allow you to dial in your favorite settings with ease.

We rate this model highly due to its affordability. Considering its size, it represents incredibly good value. When you unbox it, you’ll feel how heavy it is proportional to that small form factor.

We trust you’ve enjoyed this Kessil A80 review and we urge you to bookmark our site. Pop back any time you want unbiased reviews on the best supplies for your aquarium. See you soon!

source https://aquariumlabs.com/kessil-a80-review/

AI Prime HD Review – AquaIllumination Artificial Intelligence Aquarium LED Light for Aquariums Reviewed

AI Prime HD Review - Featured Image

Should You Consider Buying AI Prime HD+ for Your Reef Tank?

If you have an aquarium set up, you know that lights are the most complicated part. You want your light to support the life inside your aquarium. You also don’t want the lights to be too invasive for you to sleep, but you want to create a realistic and healthy atmosphere for your fish.

Those are only minor factors to consider when choosing lights. Other factors with higher stakes are:

  • Design-build
  • The lights
  • Light distribution
  • Built-in customization
  • Adjustability

It’s a lot of information to find and synthesize on your own. Even if you’ve read all the information you found through research, it’s nice to have a second opinion on each topic and an answer to the bigger question—should you consider buying the AquaIllumination Prime HD Aquarium LED light?

The AI Prime HD LED light is a costly investment. It comes with lots of features and is highly customizable, but it’s not cheap. You don’t want to impulse-buy this aquarium lighting system. It’s not for casual fish-keepers, but if you’re considering it, you’re probably a serious aquarist.

If you have a demanding reef situation in your tank, then this AI Prime HD review will tell you what you need to know before purchasing. This system should be a top contender for everyone looking to upgrade their aquarium lighting.

AI Prime HD Review – An AquaIllumination Aquarium LED Light

  • Dimensions: 4.88 x 4.88 x 1.3 in.
  • Wattage: 60 W
  • # of LEDs: 16 (+1 moon simulator)
  • Color channels: 7 (+ moon)
  • Moonlight LED included and channel for programming
  • Controls: Wi-Fi, mobile application, and desktop
  • Mount: Prime mount, Prime flex arm 12”, Prime flex arm 18”, and Prime hanging kit
  • Prime HD+ light head, AC adaptor, and 10’ power cord included
  • Compatible with rimmed and rimless tanks
  • Comes in black or white

Design-Build

The AI Prime HD LED light gets serious points for design. AquaIllumination spared no expense making sure that this bundle was as effective as possible. It’s small and light. At less than 2 pounds, the unit is about the size of an average hand.

Even though it’s a newer model, the mounting equipment was already available for purchase. It’s compatible with tanks with or without rims. So, if you decide to change your tank style, you won’t need new equipment.

There’s a setting or feature for everything. Even still, AquaIllumination managed to maintain a sleek, lightweight piece of equipment. The visual appeal works for any tank’s design aesthetic.

The fan in the light fixture is quiet, too. So, running the many features on this model is achievable with minimal sound disruption. They hit the nail on the head with most of the design elements.

It comes in two colors, black or white. The options are classic and minimalistic. This is a small detail but helps aesthetically driven customers whose tank is a design element in their space.

The Lights

It wouldn’t be an AI Prime HD review if we didn’t talk about the lights. This model comes with 16 different LEDs packed tightly together to build the best color balance for your tank. An additional setting is specifically for the moon. The lights include:

  • 3 Cree XP-G2 Cool White (> 70 CRI)
  • 3 Cree XT-E Royal Blue
  • 3 Cree XP-E2 Blue
  • 1 Cree Deep Red 660 nm
  • 1 Cree XP-E2 Green
  • 1 Semi LED 415 nm
  • 1 Semi LED 400 nm

This lighting set-up offers virtually unlimited options for customization. The peak PAR gives 100 micro mols of radiation and the set-up offers a clear and vibrant color presentation.

Light Distribution

Every system is different when it comes to light distribution. This system’s mount sits about 9 inches above the base. Some users say that the light from this AI Prime HD LED light can reach up to 24 inches x 24 inches. Others disagree.

This system wasn’t built for large tanks. We’d say that the maximum distribution area is about 24 inches x 24 inches. It’s important to remember that systems aren’t built to operate at their maximum or minimum all the time. At the maximum distribution, you’ll experience shadows at the edges if you mount this system in the middle of your tank.

If your tank is near the maximum, there’s a way to get the most out of the light distribution. Make sure you don’t place a reef near the tank edges. It’s not so important for the light to distribute that far if there’s nothing there that benefits from it.

For larger tanks, purchasing a second system is a good option. It’s also an expensive option. For edge-to-edge light distribution, around 16 inches x 16 inches is a safe measurement.

Built-In Customization and Adjustability

You can control the lights in two different ways. The system is Wi-Fi enabled. Using either your desktop or a convenient mobile app, you can access the full tool panel. On the tool panel, you can adjust each color individually. So, if you want more of the color red, you can crank it up. Adjusting a different color down helps save on power, too.

Using the timers, LED lights, and simulated moonlight allows your tank to experience natural-looking sunrises and sunsets. These features are where the customization and adjustability shine. Play with the adjustments and create your ideal sunset or sunrise. The timers allow you to create a daily timeline for a more natural “outdoor” experience for your aquarium’s inhabitants.

You could set sunrise for 6:30 AM but set the light changes to start happening earlier. The way the light will come up gradually and change over that time creates a more realistic experience. Essentially, you can turn your aquarium and its setting into its own mini-world.

Another cool setting this comes with is a storm setting. When you trigger this, it essentially mimics a storm inside. The storm feature is one of the more frivolous in the system. But, if you’re trying to keep your reef environment realistic, this feature will do that.

Pros

  • Compact
  • Customizable
  • Clear, bright light
  • Easy controls
  • Wi-Fi enabled
  • Comes with swiveling mounting attachment
  • Battery saving

Cons

  • Mount could improve

The Final Verdict

Those are the most important points to consider before making your final decision on buying an AI Prime HD. There’s a lot of information about this unit here. It’s a high-quality, hard-working lighting system. While it’s more costly than others on the market, the quality is commensurate with the price.

The design and functionality work well together for a mostly seamless experience. The main things you need to watch out for are:

  • The areas where the light distribution doesn’t reach
  • The mount

Those two areas are where you’ll have the most difficulty. Even then, the difficulty is marginal compared to the convenience. We suggested a few fixes for the distribution issue earlier in this AI Prime HD review. The mount is a manufacturer issue. Otherwise, it’s a solid lighting system.

The price point is on the higher end for this type of equipment. After reviewing the specifications thoroughly, it doesn’t seem like AquaIllumination squandered any of it. Each feature on this unit serves a dedicated purpose. We definitely recommend purchasing the AquaIllumination Artificial Intelligence Aquarium LED Light for Aquariums.

source https://aquariumlabs.com/ai-prime-hd-review/

The Ultimate Aquarium Lighting Guide

Aquarium Lighting Guide - Featured Image

You may be wondering, do fish tanks need lights? The answer is yes. Aquatic life forms experience a fluctuating amount of darkness and light in their natural habitat. That’s why, when building a healthy aquarium, you must mimic the natural lighting conditions of the environment, to guide your fish to healthy life and development.

Because aquarium lighting is so important to the health and hygiene of your fish tank, you should research all your options, so you choose the right spectrum of light. 

In our guide below, we’ll go into the requirements of a healthy aquarium and the right bulbs needed to create one.

Why Is Aquarium Lighting So Important?

Aquarium lighting is an investment nobody should neglect. Even in a beautiful fish tank, if the lighting isn’t right, the plants and fish won’t develop as they would in their natural environment. 

When shopping for aquarium lighting, pay close attention to the color spectrum and needs of your specific aquatic life. Freshwater and saltwater fish and plants have different needs, so use our saltwater and freshwater aquarium lighting guide guide below to know what to look for.

Light Spectrum and Intensity 

The most important factors to aquarium lighting are light spectrum and light intensity. Spectrum and intensity depend on varying factors such as: 

  • Water depth
  • Water and air clarity
  • Temperature

When choosing how to light, the main goal for your freshwater or saltwater reef fish tank is to make your aquatic pets feel like they’re in their natural environment. You have more flexibility with fish than plants when doing so.

When describing the spectrum of aquarium light, bulbs are scaled by a Kelvin, or K, rating. This K-rating tells us the color temperature of the bulb. Lower K-rated bulbs give off a warmer, reddish hue. Bulbs with a higher K-rating gives a cooler, blue light. 

Daylight around noon would equal about 5,500K. Most fish tanks typically range between 5,000 to 20,000 Kelvin.

At sea level, we measure sunlight at around 5,500K. A bulb with this same K-Rating would be suitable for a shallow freshwater water aquarium or reef. The deeper the natural habitat of your aquatic life, the higher K-Rating bulbs you’ll need to light your freshwater fish tank or saltwater reef.

Aquarium Lighting Guide

Here’s our full aquarium light bulb guide featuring the properties, pros and cons, and compatible uses for each bulb style. Use this guide as a reference when creating the appropriate lighting for your freshwater fish tank or saltwater reef.

Incandescent Bulbs

These bulbs last for 2 to 4 months. They come in a range of 7-25 watts. The K-Rating depends on the color of the bulb.

Pros:

  • Inexpensive
  • Available in many colors

Cons:

  • Narrow spectrum
  • Low-light intensity
  • Gives off heat

Verdict

These are the most basic bulbs in our aquarium lighting guide. Incandescent bulbs are great for a small, freshwater fish tank or starting a beginner’s aquarium. 

Standard Fluorescent Bulbs

These bulbs come in a range of 15-40 watts and a K-Rating of 3,000-20,000K. Actinic bulbs are available in this style.

Pros:

  • Come in a variety of colors and sizes
  • Efficient
  • Don’t give off heat
  • Inexpensive

Cons:

  • Incompatible with photosynthetic plants

Verdict

Use standard fluorescent bulbs for a freshwater tank and saltwater reef. They also work in a reef with a low-light variety of corals or aquarium fish in cold water.

Compact Fluorescent Bulbs (Versions of Standard Fluorescents with Higher Light Output)

These bulbs range from 10-130 watts and a K-Rating of 5,000-10,000K. They last 12-28 months and are available as actinic bulbs.

Pros: 

  • Long-lasting
  • High light intensity
  • Wide spectrum

Cons:

  • Can produce high heat and require chilling equipment

Verdict

Use compact fluorescent bulbs for a reef or fish tank that’s less than 24 inches deep. These are compatible with freshwater planted fish tanks.

T-5 HO (High Output) Fluorescent Bulbs

T-5 HO bulbs range from 24-54 watts and a K-Rating of 6,000-11,000K. They are available as actinic bulbs.

Pros:

  • High-intensity 
  • Small 
  • Cool temperature

Cons:

  • Incompatible with aquariums deeper than 24 inches

Verdict

Use T-5 HO bulbs in a freshwater planted aquarium and reef less than 24 inches deep.

VHO (Very High Output) Fluorescent Bulbs

VHO bulbs range between 75-165 watts and have a K-Rating of about 10,000. They last 4-18 months and are available as actinic bulbs.

Pros:

  • Available in many sizes

Cons:

  • Produce high heat
  • May require cooling equipment

Verdict

Use VHO bulbs for freshwater planted aquariums and reefs less than 24 inches deep.

Metal Halide Bulbs

These are the highest K-rated bulbs in our reef lighting guide. They range between 70-1,000 watts and 4,000-20,000 Kelvin. They last between 6 and 18 months. 

Pros:

  • High-intensity light
  • Wide spectrum
  • Good for high-light aquariums

Cons:

  • High-heat
  • May require cooling equipment
  • Give off UV radiation
  • Require special handling to avoid injury

Verdict

Metal halide bulbs are the only options in our reef lighting guide that require added caution when handling. These are suitable for a freshwater aquarium or reef deeper than 24 inches. They work well with invertebrates and photosynthetic coral reefs.

LED (Light-Emitting Diode) bulbs

LEDs range between .05-5 watts. They last up to 50,000 hours. The K-Rating depends on the array of LED bulbs.

Pros:

  • The most energy-efficient option
  • Reduce the amount of aquarium maintenance

Cons:

  • Sensitive to heat
  • Require ventilation

Verdict

Of all the bulbs in this guide, LED aquarium lighting is the most efficient available. They work as the main source of light for all saltwater marine and freshwater aquariums. That includes a coral reef tank. Use our LED aquarium lighting guide to explore the variety of options available on the market.

Final Thoughts

Overall, the best freshwater or saltwater LED lights will emit a consistent amount of light in the entire tank. As stated in our aquarium lighting guide, using too little light can stunt your reef, fish, and aquatic plant growth. Alternatively, too much light will result in your fish tank growing an excess of algae, which increases the maintenance required to keep a healthy fish tank.

Since the change of seasons guides natural light changes, the lighting in your fish tank will need to change as well. Consider seasonal changes, temperature, light temperature, and intensity when crafting the perfect aquarium lighting, whether it’s a saltwater or freshwater tank.

You guarantee the quality of life and the long-term well-being of your fish when you take the time to find appropriate lighting. Using our aquarium light guide, you can create the best home for your plants and fish that’s safe and beautiful.

source https://aquariumlabs.com/aquarium-lighting-guide/

Red Slime Algae: What Is It And How Do You Get Rid Of It?

How to Get Rid of Red Algae - Featured Image

If you’re anything like most aquarium owners, you care deeply about your fish. You are meticulous about your tank and want your aquarium in tiptop condition. That’s exactly why red slime algae are such unwelcome visitors in your aquarium’s ecosystem. Red algae can blanket tank walls, live rocks, and even invertebrates such as clams and corals. They spread like wildfire, if wildfire could spread underwater, that is.

If you have red slime algae in your aquarium, there may be a simple explanation. To restore your aquarium to its original pristine state, you’ll need to understand a few things about what red slime algae is, why they grow, and how to rid your aquarium of this bacteria.

Don’t be discouraged if you find your tank coated with these invasive organisms. It’s a common problem that all aquarium owners face at one point or another. Here, we’ll dive deep into this dreaded aquatic menace and learn how to keep it at bay.

What Exactly Is Red Slime Algae?

Also called cyanobacteria, red slime algae are photosynthetic organisms. Contrary to the name, red slime algae are bacteria with a red pigment.

They are extremely fast-growing, and before you know it, a small amount can engulf your entire aquarium. They are one of the oldest known organisms, and they sure are resilient; red algae can grow back in just a couple of hours!

What Are The Causes of Red Slime Algae?

There may be a couple of culprits behind the algae bloom in your aquarium. Once you have identified the cause, you’ll be able to get rid of the aquatic nuisance.

Here are the main reasons red slime algae take over a tank:

Lighting

Believe it or not, the cause behind your overrun aquarium and horrible profile picture may be the same: bad lighting! Bulbs below 10,000 kilowatts provide ideal conditions for cyanobacteria to grow. Don’t try to save by using cheap bulbs. You’ll end up paying for it later.

Keep in mind that bulbs begin to dim after 8-12 months, creating an environment that encourages algae growth. Replace bulbs frequently to avoid creating a haven for cyanobacteria.

Unclean Tank

Every aquarium enthusiast knows that regularly cleaning your tank is a must. Slacking on this can lead to lots of problems in the long run, red slime algae included. Not changing the water in your tank frequently enough can create the perfect habitat for cyanobacteria.

Excess Nutrients

There are several reasons why excess nutrients might be building up in your tank and causing red slime algae to grow.

The most common causes are:

  • A dead fish
  • An improperly cured live rock
  • Unchanged water

Red slime algae cannot live without the proper nutrients. Therefore, if you get rid of the nutrients, you’ll get rid of the red slime as well. Let’s take a closer look at exactly how to get rid of red algae in a saltwater tank.

How Do I Get Rid of Cyanobacteria?

Now that you understand what red algae are and why they might be in your tank, let’s explore how to get rid of them. If you aren’t sure what prompted the bacteria growth or think it might be a combination of things, don’t worry. All of these tips will help protect your aquarium against red slime algae.

Often the best way to eliminate cyanobacteria for good is a combination of removal and prevention.

Reduce Your Lighting

Cyanobacteria needs a light source to grow as this bacteria is a photosynthetic organism. Try reducing your light level slightly and only leaving the light on for 7-9 hours a day. This will prevent red slime algae from growing rapidly. Just don’t forget about any other photosynthesizes in your tank, such as coral!

Regular Maintenance

The importance of regular aquarium maintenance really can’t be overstated. Regular water changes (at least once a week) prevent nutrients that sustain cyanobacteria from building up in your tank. If you find that you don’t have time for weekly water changes, replace a greater volume of water each time you clean.

If you have cyanobacteria in your tank, you can use a toothbrush to remove the residue from rocks and surfaces. Vacuum up any floating bits dislodged during your brushing.

Be Wary of Nitrates

Beware of any objects in your aquarium that may be producing nitrates en masse, such as wet/dry filters or bio-balls. Nitrates can also build up due to infrequent water changes or a poor water source. Nitrates are one of the leading causes of red slime algae growth and can even harm your fish if levels get too high.

The water you’re using could also be full of nitrates. Non-purified tap water is often teeming with nitrates and phosphates. Consider using an RO/DI water filtration system to separate any dissolved nutrients that red slime algae feed on.

Make Sure Live Rocks are Cured Properly

Live rocks that aren’t cured properly are like assembly lines for decaying materials such as nitrates, phosphates, and nitrites. These excess nutrients will build up, and red slime algae will feed on them. Refrain from adding any live rocks that aren’t fully cured to your tank unless you want a red slime algae explosion.

Use a Protein Skimmer

If you’re past the prevention stage and have an aquarium full of cyanobacteria, you’ll need to know how to remove red algae from a saltwater tank. Protein skimmers are perfect for the job. They remove the organic compounds that red slime algae feed on before growth gets out of hand.

Protein skimmers also fill the water in your tank with air bubbles. Organic compounds that would normally build up and allow cyanobacteria to grow sticks to these air bubbles instead. Foam is then formed and transferred to a collection cup, keeping problematic organic compounds out of your tank.

Invest In a Phosphate Reactor

The only thing cyanobacteria love more than nitrates is phosphates. Where phosphates are, red slime algae is sure to follow. A phosphate reactor gives you peace of mind, eliminating excess phosphates that build up in your tank over time.

Increase Your Water Flow

In areas where water flow is weak, cyanobacteria can thrive. Placing powerheads throughout your tank will increase water flow, preventing the growth of red slime algae. Powerheads tend to be relatively inexpensive and make a world of difference.

What About Chemical Tools?

Some aquarium enthusiasts sites might recommend that you use chemicals to fix your red slime algae problem. Although it may seem like a miracle cure at first, the long-term results are less than desirable. Most red slime fighting chemicals are antibiotics (to wipe out the cyanobacteria) and end up killing more than the red slime.

Your tank also has good bacteria in it, bacteria that help keep the ammonia and nitrates levels of your tank in check. If these friendly bacteria are wiped out, your aquarium will be in real trouble.

Although red slime algae are unsightly and annoying, this bacteria is not nearly as harmful to your fish as eliminating all the beneficial bacteria from their habitat. It’s best to avoid chemical solutions when it comes to curbing red slime algae.

Antibiotics are also only a band-aid and will not address the underlying cause of the red algae slime. It’s best to eliminate the problem at the source, which is likely an issue with lighting, cleanliness, or nutrients buildup.

Will Red Algae Ever Go Away For Good?

The battle against red slime algae is an ongoing fight for aquarium owners. This bacteria spawns for a variety of reasons and grows rapidly once present. However, it has its weaknesses.

Now that you know how to get rid of red algae and how to prevent it, your tank will be cleaner, and your fish friends will thank you.

source https://aquariumlabs.com/how-to-get-rid-of-red-slime-algae/

How Much Live Rock Per Gallon Do I Need?

How Much Live Rock Per Gallon - Aquarium Labs

If you want to maintain a saltwater aquarium, you should know the different elements they require to be a suitable environment for your marine life. A tank should have more than just water. Adding a healthy foundation and beautiful decorations are an essential and fun part of maintaining your aquarium.

Before you begin adding your marine life, you should be sure you have enough live rock. But how much live rock per gallon is appropriate for your tank? We’re here with the answers to the most frequently asked questions about live rock.

What is Live Rock?

Before we answer your further questions, you should understand what live rock is. The term “live rock” is a misnomer, as these types of stones aren’t alive at all. The name comes from the micro and macro-organisms with live inside and on top of the rock. The rock itself is made from dead coral, calcium carbonate skeletons, or other calcareous organisms.

There are two main types of live rock you can consider for your tank:

  1. Reef rock. Reef rock is essentially coral or coral rock that comes from outside a reef. Organisms encrust this reef rock after it breaks off and sinks to the bottom of the ocean. Sponges and coralline algae tend to form on these types of stones.
  2. Inshore rock. This type lives within the coral reef. Clams, crabs, mussels, shrimp, macroalgae, and other unwanted organisms cover it. It’s denser and tends to stabilize an aquarium slower than reef rock.

You can also add a mix of dead base rock to balance out your aquarium. These are rocks with no life on them, which are designed so you can build a live foundation on top. Once you’ve mixed the two in your tank, your dead base rock will slowly become live rock. You can then add more advanced forms of life on top of this.

Is It That Important?

The marine animals you are going to buy are initially from the ocean, even if they have been captive-bred. This means it’s important to replicate the ocean ecosystem as closely as possible. You shouldn’t only consider the saltwater – ocean water bacteria is essential as well. It allows your organisms to live a long, healthy life.

That being said, live rock serves as the backbone of your tank’s success. That’s because the organisms they are home to provide denitrifying bacteria that clean the tank. All living organisms produce waste containing ammonia. This is potentially a very toxic substance if it is not kept in check. Live rock prevents fish from burning their gills and killing themselves while swimming in their waste.

Many people are eager to set up their tanks right away. Without stones and sands, adding the correct nutrients to your tank can be a long and challenging process for you and any animals you may own. On the other hand, beginning with fully grown or fully cycled live rock can cause it to dead base rock quickly.

How Much Live Rock Do I Need?

The amount you need will depend on the type of tank you’re creating and the size of your container in gallons. If your goal is to create a more open-feeling tank, you may want a pound per gallon for the aesthetics and filtration purposes. However, many aquarium enthusiasts suggest 1.5 to 2 pounds of live rock per gallon of water to create a solid foundation and wall-type effect.

If you want to make your aquarium look like a proper reef, you could have up to 3 pounds of the product per gallon. This will give your tank a stable, aesthetically pleasing rock wall. Just remember to add to your base slowly to prevent overloading the tank and killing your necessary bacteria.

You should also take the density of your live rock into account. Fifty pounds of less dense stone will take up much more space than 50 pounds of a denser product. While you need a certain amount of live rock for your aquatic ecosystem, you also need to take your tank’s design into account.

How Much Does Live Rock Cost Per Pound?

Live rock can cost anywhere from $5 to $12 per pound. If you’re buying used this product for your tank, you may be able to get a deal for $2 to $3 per pound. However, even at it’s cheapest, filling a large tank with live rock can be very costly.

Making the product yourself can help you save money. Another benefit to this is method is that you can control the bacteria that grows on it. However, it will take more time and effort to do this yourself. Always consider your budget when deciding on the kind of live rock you’re buying.

It’s not a requirement to buy your live rock all at once, either. You may purchase a certain amount and realize it’s not the look you want to achieve. Adding slowly may even prove better for your tank’s ecosystem if you maintain its nitrates and ammonia levels.

Skimping on the tank’s filtration system can prove harmful for your marine animals in the future. It’s best to invest as much as possible, even if it takes you longer to save the money.

How Much Live Rock Do I Need for a 75-Gallon Tank?

The equation to solve how much live rock you need is straightforward. You multiply the number of gallons in your tank by the number of pounds per gallon you’d like. Therefore, you would need 112.5 to 150 pounds of live rock for a 75-gallon tank to achieve 1.5 to 2 pounds per gallon.

Shopping Online Vs. In-Person

Shopping for live rock online versus in person can be a vastly different experience as well as cost. In most cases, it’s best to purchase this product from a wholesaler or local fish store. However, shopping online can have its benefits at an added cost.

If you visit a local fish store, make sure you can see and smell the product in person. This way, you can tell whether it has dying growth or a bad odor. These are markers that the stone is still curing and needs time before you introduce it to the tank. It’s best to buy live rock that’s fully cured, so there is less hassle.

Buying online can become expensive due to shipping costs. Not only are you buying pounds upon pounds of rock, but there is also added weight from the water. Live rock should always ship submerged in water, so it’s appropriately cured and ready to put in your tank.

Summary

Live rock is a necessary filtration system, as well as an aesthetic element to your saltwater aquarium. Though it’s an expensive material, some alternatives will allow you to save money and keep your tank healthy. There are many different ways to get good quality and useful organic material out there to consider.

Once you’ve cured your live rock, make sure you add your fish and other organisms slowly. They should live in a properly-tested environment with plenty of room to move and hide in the rocks. Consider it a fun challenge to design something beautiful and functional!

source https://aquariumlabs.com/how-much-live-rock-per-gallon/